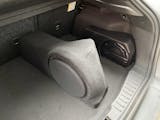
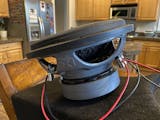
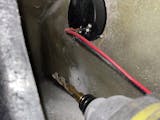
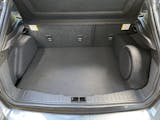
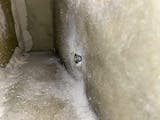
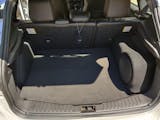
Just like the other review, this thing is fantastic! Fits absolutely perfectly in the space and build quality is very solid. I paired it with a cheap Boss “1100W” amplifier, wired it to the power source my factory Sony amplifier module uses, and tapped into the rear door speaker wires (at the amp) for high input signal. Install was tedious, but came out very clean after significant effort. Has garnered lots of attention since. Annoyingly, besides the idiotic rear mounting point design (seriously, who checked that before releasing it), the speaker comes in a box with zero instructions whatsoever. Only a vague mounting bracket was included along with the sub. So that you may learn from my pain, below I will leave a list of helpful hints from my installation experience.Brief Install guide (see photos for reference):(**this assumes you already have a Focus ST2/3 or Titanium/SEL with the Sony audio system. For those with the base stereo, wiring may be more complicated and you will need two M6x1.0 nuts).Steps:- Remove your factory subwoofer and unclip green wire harness.- Figure out an aftermarket amp. As mentioned, I used the cheapest Boss one I could find here, and it works well. If you aren’t familiar with car audio, STOP. This install is not for beginners. You will hate yourself and/or break something. Take it to a car audio shop.- With the amp situation sorted, begin the sub installation by first removing the driver from the enclosure and unclipping the wires before setting the woofer aside.- Install the metal floor bracket to the bottom of the enclosure as shown in the photos.- Move the bare enclosure to the car and mock-install in place. Make sure everything lines up right. Pull the enclosure away from the wall and connect your amplifier wires now.- Place the box back against the wall of the trunk, aligning the threaded wall stud with the hole as well as making sure the lower bracket sits on the threaded floor stud, and push it into place. Tighten a factory nut onto the floor stud to secure the lower bracket.- Use a drill with the biggest bit you can find and go to town on the material surrounding the threaded metal insert on the inside of the wall of the enclosure. You need to remove enough material to expose juuuuust enough of the threaded stud that the nut can grab onto it and be slightly tightened down onto it. You’ll see that I had to flip mine backwards to get the threads to make contact. This was after removing about 2mm of surrounding material, AND going to town on the metal insert itself to grind it away somewhat. Really poor design.- If you still cannot get the nut to grab after hacking at the inside of the box, then remove the box from the car once again and grind away at the rear face that slightly protrudes into the divot in the wall of the car (see photo with drill sitting on back of box). Try fitting again. I had to have an assistant shove the box hard against the wall so I could thread the nut onto the stud, but I eventually got it. Used pliers to slowly turn the nut to a satisfactory tightness.- With the enclosure installed, reinstall the driver into the hole. Make sure the wires get properly reattached and that the rotation is correct.- Power up your stereo and test/tune the sub as you desire.- The trunk floor mat should easily fit back in place, just need to slighly bend it while sliding underneath the sub box in a rightward motion.Hope this little guide helps. If you’re comfortable with DIY car audio, I highly recommend giving this a go, the results are more than worth the effort to install. And even if you aren’t comfortable doing this yourself, this unit is a considerable alternative to the pricier JL Audio Stealthbox for the ‘12-‘18 Focus, and any competent local audio shop will be more than able to put it all together for you. The end result is the cleanest aftermarket setup I’ve seen so far for these cars. Very pleased.


